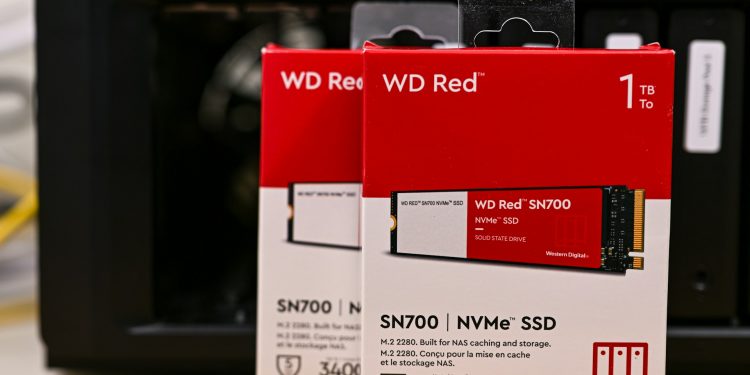
Solid State Drives (SSD) and NVMe drives have become essential for modern computing, offering faster data access speeds and improved reliability over traditional hard drives. However, like any storage device, their health and performance can degrade over time. Monitoring the health of these drives can help predict failures and prevent data loss. One of the most effective tools for this task is smartctl, part of the smartmontools package, which provides a suite of utilities to control and monitor storage devices through the Self-Monitoring, Analysis, and Reporting Technology (SMART) system.
What is SMART?
SMART is a monitoring system included in SSDs and NVMe drives that detects and reports various indicators of drive reliability with the aim of anticipating hardware failures. When SMART data indicates a potential failure, it’s crucial to take action to prevent data loss.
Installing smartmontools
Before diving into how to use smartctl, you need to have it installed on your system. smartmontools is available for Linux, macOS, and Windows.
- Linux (Debian/Ubuntu):
sudo apt-get update sudo apt-get install smartmontools - macOS (using Homebrew):
brew install smartmontools - Windows: Download and install the smartmontools package from its official website.
Checking Drive Health with smartctl
- Identify Your Drive
First, you need to identify the storage device you want to check. Use
lsblkon Linux ordiskutil liston macOS to list all drives and their partitions. Windows users can useDisk Managementor the commandwmic diskdrive list briefin the Command Prompt. - Running a Health Check
Use the
smartctlcommand to perform a health check on your SSD or NVMe drive. Replace/dev/sdXwith your drive identifier (e.g.,/dev/sdafor Linux,/dev/disk1for macOS, or\\.\PhysicalDrive1for Windows).- Basic Health Check:
sudo smartctl -H /dev/sdX
- Basic Health Check:
- Viewing SMART Data
To view a comprehensive SMART report, which includes various attributes like temperature, read/write errors, and more:
sudo smartctl -a /dev/sdX - Running Tests
smartctlallows you to run different types of tests to check the integrity of your drive.- Short Test: Takes a few minutes and is a quick way to detect major issues.
sudo smartctl -t short /dev/sdX - Long Test: More thorough and can take several hours, depending on the drive’s size.
sudo smartctl -t long /dev/sdXAfter initiating a test, use the following command to check the test’s status and result:
sudo smartctl -l selftest /dev/sdX
- Short Test: Takes a few minutes and is a quick way to detect major issues.
Key SMART Attributes and Their Meanings
SMART attributes are the specific metrics that drives monitor. While there are many attributes, some are more critical than others for assessing drive health. Here are some of the most important ones:
Reallocated Sector Count: Indicates the total number of sectors that have been found defective and remapped to a spare area. A high count suggests a failing drive.
Power-On Hours (POH): Represents the total number of hours the drive has been operational. This helps gauge the age and usage level of the drive.
Drive Temperature: Monitors the operational temperature of the drive. High temperatures over prolonged periods can reduce the lifespan of a drive.
Wear Leveling Count: Specific to SSDs, this attribute shows how evenly the drive wears out its memory cells. It's crucial for understanding the remaining lifespan of an SSD.
End-to-End Error: This attribute indicates data corruption that can happen during the transfer between the host and the drive itself. It's a critical parameter for data integrity.
Uncorrectable Error Count: Represents the number of errors that could not be fixed by the drive's error correction code (ECC). High values may indicate a failing drive.
Interpreting SMART Data
Interpreting SMART data involves more than just reading raw values. It requires understanding what each attribute signifies and how it relates to drive health. Here's how to approach this task:
Access SMART Data: Use a tool like
smartctlto retrieve the SMART data from your drive. The commandsmartctl -a /dev/sdX(replace/dev/sdXwith your drive identifier) will display a comprehensive report.Analyze Critical Attributes: Focus on the key attributes mentioned earlier. Compare their values to the manufacturer's thresholds to determine if they are within a safe range.
Look for Patterns: One-off values might not indicate a problem, but a pattern of deteriorating metrics over time can signal a declining drive health.
Consider Real-World Implications: For example, a high reallocated sector count not only indicates a failing drive but also can lead to slower performance as the drive struggles to read from or write to the remapped sectors.
Use SMART for Proactive Maintenance: Regularly monitoring SMART data allows for proactive measures, such as cloning the drive before a total failure occurs.
Advanced SMART Metrics for SSDs
SSDs use NAND flash memory, which has a finite number of write cycles. Several SMART attributes are particularly relevant for SSDs:
- Program Fail Count: Shows how many times the drive failed to write data. Repeated failures can indicate a problem with the drive's flash memory.
- Erase Fail Count: Indicates the number of failed attempts to erase a block in the SSD. High numbers can suggest nearing the end of the drive's lifespan.
- SSD Life Left: A predictive measure of the remaining life of an SSD, usually presented as a percentage. It's calculated based on the estimated endurance of the NAND flash memory.
Practical Tips for Using SMART Data
- Regular Checks: Schedule regular checks of your SMART data to catch potential issues early.
- Software Tools: Utilize software that can monitor SMART data in real-time and alert you to potential issues.
- Manufacturer Tools: Many drive manufacturers offer their own tools for monitoring drive health, which may provide more detailed information for specific drives.
Monitoring the health of SSDs and NVMe drives using smartctl is a proactive approach to safeguarding your data. Regular checks can help you spot potential issues early and take necessary actions, such as backing up data or planning for a drive replacement. Remember, while SMART data can be a powerful tool in predicting drive failures, it’s not infallible. Always maintain regular backups to prevent data loss.


Discussion about this post