Plausible Analytics is a lightweight and open-source web analytics tool. It is a simple and privacy-friendly alternative to Google Analytics. With Plausible, you can track your website visitors and get valuable statistics that help to improve the user’s experience.
This tutorial will discuss how to install and set up Plausibe Analytics on Ubuntu 22.04 server.
Prerequisites
- An Ubuntu 22.04 server with sudo privileges
- Docker and Docker Compose installed
- A domain name pointed to your server’s public IP address
If you do not have Docker and Docker Compose installed, follow the below installation guide.
Install Docker on Ubuntu 22.04
The Docker package is available on the Ubuntu package repository. You can use the apt command to install Docker.
First, you have to update your package list.
$ sudo apt update
Next, install the packages that allow apt to use packages over HTTPS.
$ sudo apt install apt-transport-https ca-certificates curl software-properties-common
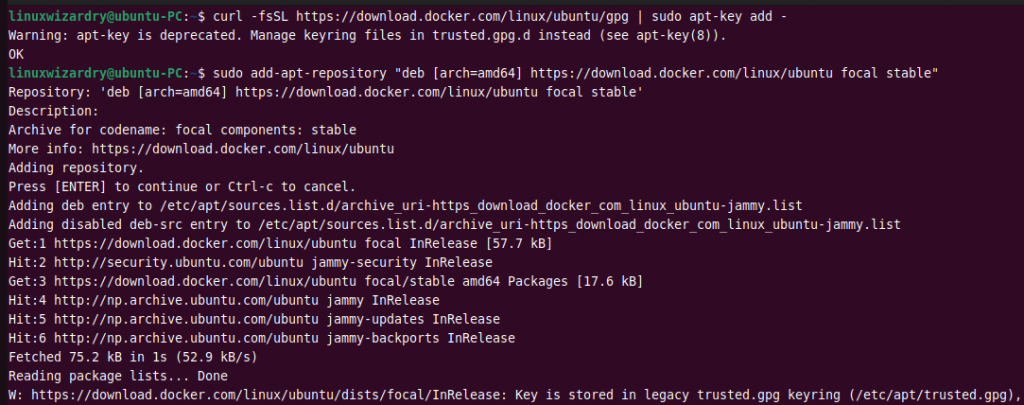
Then you need to add the GPG key for the official Docker repository to your system.
$ curl -fsSL https://download.docker.com/linux/ubuntu/gpg | sudo apt-key add -
Output:
Warning: apt-key is deprecated. Manage keyring files in trusted.gpg.d instead (see apt-key(8)).
OK
Add the Docker repository to APT sources.
$ sudo add-apt-repository "deb [arch=amd64] https://download.docker.com/linux/ubuntu focal stable"
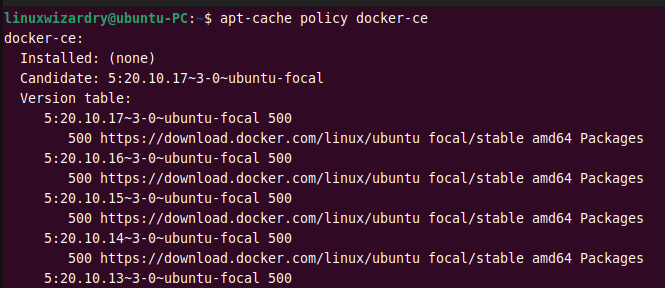
Now, make sure you are installing Docker from the Docker repository instead of the Ubuntu repository.
$ apt-cache policy docker-ce
Finally, you are ready to install Docker with this command.
$ sudo apt install docker-ce
Once the Docker is installed, run the command below to check whether the daemon is active and running.
sudo systemctl status docker
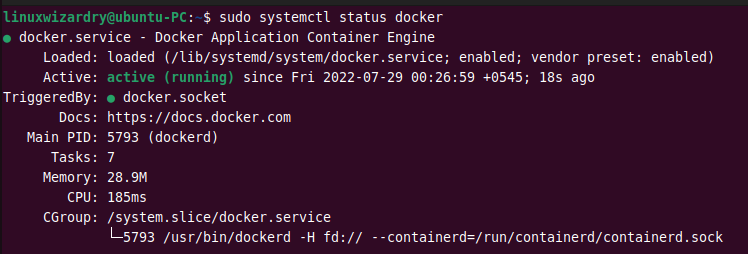
The above output confirms that the docker service is active and running in the system.
Install Docker Compose on Ubuntu 22.04
You can install the latest stable version of Docker Composer from its official Github repository. You can check for the latest version available on the releases page.
The following command downloads the latest release 2.7.0 of Docker Compose.
$ sudo curl -L https://github.com/docker/compose/releases/download/v2.7.0/docker-compose-linux-x86_64 -o /usr/local/bin/docker-compose
Output:
% Total % Received % Xferd Average Speed Time Time Time Current
Dload Upload Total Spent Left Speed
0 0 0 0 0 0 0 0 --:--:-- --:--:-- --:--:-- 0
100 24.5M 100 24.5M 0 0 5748k 0 0:00:04 0:00:04 --:--:-- 6725k
Set the correct permission to make the docker-compose command executable.
$ sudo chmod +x /usr/local/bin/docker-compose
To confirm whether the installation is successful, you can run this command.
$ docker-compose --version
Output:
Docker Compose version v2.7.0
Now we have installed all the required packages. Let’s move to the installation of Plausible Analytics.
Step 1: Install Plausible Analytics with Docker Compose
Plausible Analytics has a Git repository with all the configuration files required for self-hosting the application. In this step, you will create the clone of a Git repo to your server, update the configuration files, and start the app.
Navigate to the /opt directory.
$ cd /opt
Next, run the git command below to clone the Plausible’s Git repo into the directory /opt.
$ sudo git clone https://github.com/plausible/hosting
All the configuration files are inside a /opt/hosting directory. Navigate to that directory.
$ cd hosting
Now, you have to edit the configuration files plausible-conf.env.
Before that, generate a random 64-character secret key using the following command.
$ sudo openssl rand -base64 64
Copy the secret key to your clipboard and edit the configuration file.
$ sudo nano plausible-conf.env
The following parameters need to be filled in the configuration file.
ADMIN_USER_EMAIL= your_email
ADMIN_USER_NAME=admin_username
ADMIN_USER_PWD=admin_password
BASE_URL=your_domain
SECRET_KEY_BASE=paste_secret_key_here
After you fill in all the parameters, save and exit the editor.
Now you have to update the docker-compose.yml file. The docker-compose command uses this file to configure and start multiple Docker containers.
$ sudo nano docker-compose.yml
In the plausible: section, find the ports: and edit it like the following.
    ports:
      - 127.0.0.1:8000:8000
This ensures that Plausible is not publicly available and only listens on the localhost interface.
Save and exit the docker-compose.yml file, then run the following docker-compose command to download, configure, and start the containers.
$ sudo docker-compose up --detach
You should see a similar output as below.

After that, visit 127.0.0.1:8000 in the browser. If you see the login page, it means the server is up and running.
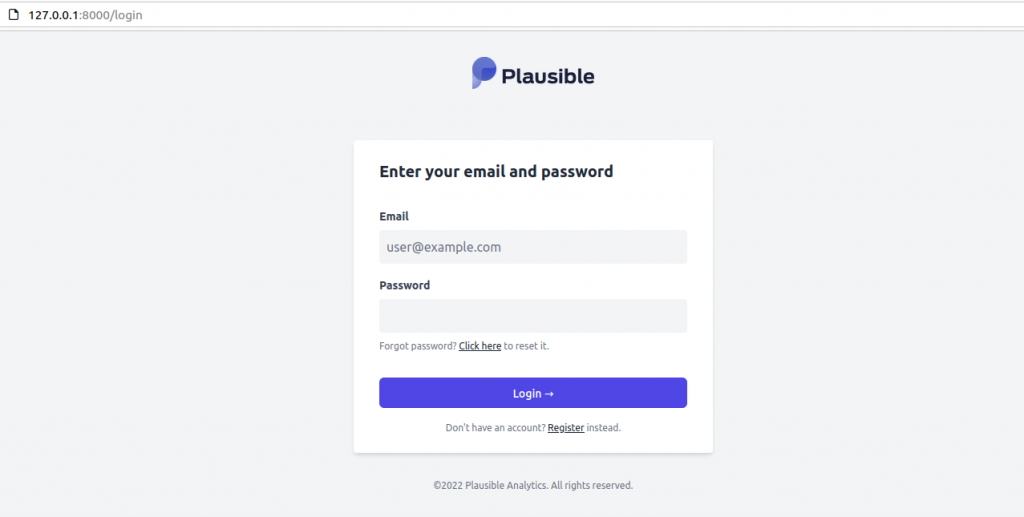
In the next section, we will configure the Nginx server to reverse proxy Plausible from localhost to the public.
Step 2: Install and Configure Nginx on Ubuntu 22.04
First, you have to update the package list.
$ sudo apt update
Next, run this command to install Nginx.
$ sudo apt install nginx
Then allow public traffic to ports 80 and 443 with the Nginx Full UFW application profile.
$ sudo ufw allow "Nginx Full"
Output:
Rules updated
Rules updated (v6)
Then create a new Nginx configuration file in the directory /etc/nginx/sites-available. We will name it plausible.conf but you can also use a different name.
$ sudo nano /etc/nginx/sites-available/plausible.conf
Add the following content into the file and replace the domain name with your own that you have pointed to your Plausible server.
server {
listen 80;
listen [::]:80;
server_name your_domain;

access_log /var/log/nginx/plausible.access.log;
error_log /var/log/nginx/plausible.error.log;
location / {
proxy_pass http://localhost:8000;
proxy_set_header X-Forwarded-For $proxy_add_x_forwarded_for;
}
}
After saving the file, run the command below to enable the configuration by linking it to /etc/nginx/sites-enabled/.
$ sudo ln -s /etc/nginx/sites-available/plausible.conf /etc/nginx/sites-enabled/
Verify whether the configuration file syntax is ok with this command.
$ sudo nginx -t
Output:
nginx: the configuration file /etc/nginx/nginx.conf syntax is ok
nginx: configuration file /etc/nginx/nginx.conf test is successful
Finally, reload the Nginx service to make these changes effective.
$ sudo systemctl reload nginx
Now can view your Plausible site by entering your domain name http://your-domain on the web browser.
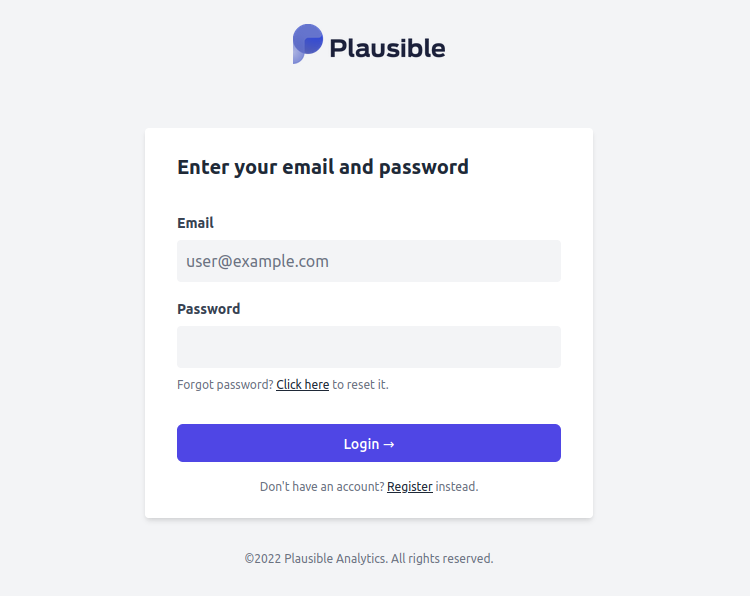
The site is running over HTTP, and the connection is not secure. Let’s see how you can secure an HTTPS connection using the Certbot and Let’s Encrypt certificates on Ubuntu 22.04.
Step 3: Install Certbot and Set Up SSL Certificates for Plausible Analytics
First, you need to update the package list.
$ sudo apt update
Next, run the following command to install Certbot and its Nginx plugin.
$ sudo apt install certbot python3-certbot-nginx
Then run certbot command in --nginx mode and specify your domain name.
$ sudo certbot --nginx -d your_domain_here
You will be prompted to enter the email address and accept the terms of service. Type Y and press enter to accept. You will also be asked if you want to subscribe to the Electronic Frontier Foundation mailing list.
After finishing it, the Certbot will request the certificate from Let’s Encrypt and confirms if the certificates are successfully enabled. The certificates will expire in 90 days.
Output:
- - - - - - - - - - - - - - - - - - - - - - - - - - - - - - - - - - - - - - - -
Congratulations! You have successfully enabled https://plausible.example.com
- - - - - - - - - - - - - - - - - - - - - - - - - - - - - - - - - - - - - - - -
IMPORTANT NOTES:
- Congratulations! Your certificate and chain have been saved at:
/etc/letsencrypt/live/plausible.example.com/fullchain.pem
Your key file has been saved at:
/etc/letsencrypt/live/plausible.example.com/privkey.pem
Your certificate will expire on 2022-10-30. To obtain a new or
tweaked version of this certificate in the future, simply run
certbot again with the "certonly" option. To non-interactively
renew *all* of your certificates, run "certbot renew"
- If you like Certbot, please consider supporting our work by:

Donating to ISRG / Let's Encrypt: https://letsencrypt.org/donate
Donating to EFF: https://eff.org/donate-le
Now reload your website, and it will be switched over to HTTPS. The connection is now secure, and it’s safe to log in with the admin user credentials saved in Step 1.
A verification code will be sent to your email address to verify your registration. After you log in successfully, you can add your website details and set it up with Plausible.
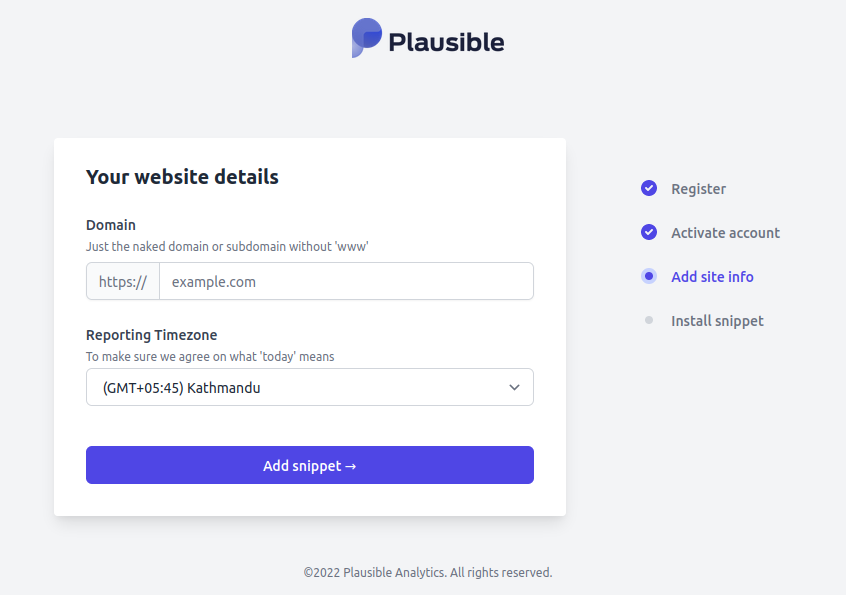
Congratulations! You have successfully installed and configured Plausible Analytics on Ubuntu 22.04.
Conclusion
Now you know how to set up Plausible Analytics with Docker and Docker Compose on Ubuntu 22.04. You have also learned to configure the Nginx server to reverse proxy requests to Plausible and secure the connection using the Certbot and Let’s Encrypt.
We hope you find this article helpful. If you have any confusion, please let us know in the comment section.
