Rust is an open-source programming language that is designed to be safe, concurrent, and fast. It is a statically-typed language with a rich type system and ownership model that focuses on memory safety and performance. Rust has been a popular choice for developers working on embedded systems and scalable web applications. Some large companies that use Rust include Mozilla, Dropbox, Cloudflare, Amazon, Microsoft, and many others.
Installing Rust on Ubuntu 22.04 is a straightforward process and can be done in just a few simple steps. In this article, we will look at two different methods to install Rust language on Ubuntu 22.04.
Prerequisites
To follow along with this tutorial, you will need:
- An Ubuntu 22.04 system
- A non-root user with access to sudo privileges
Method 1: Install Rust using apt
The official Ubuntu package repository provides the Rust package, which can be installed with the apt tool.
First, execute this command to update the package repositories.
$ sudo apt update
After the update is completed, install the rustc package using the apt command.
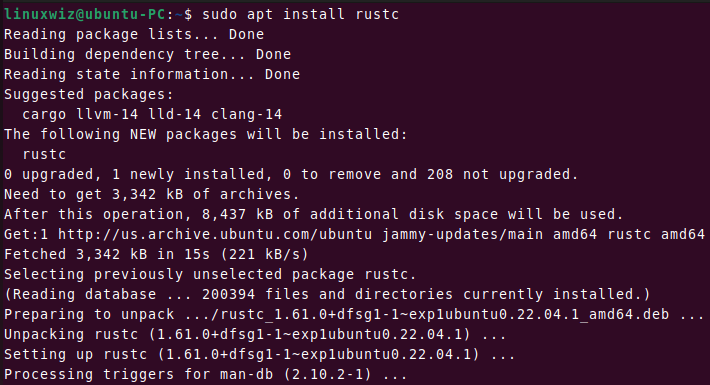
$ sudo apt install rustc
When prompted, type y and press Enter to proceed with the installation.
You can verify the installation by checking the version of Rust installed on your system.
$ rustc -V
Output:
rustc 1.61.0
1.61.0 is the version of Rust that is installed on the system.
Create and Run a Rust Program
Now, let’s write a simple Rust program and run it using the rustc command. Rust files end with .rs extension.
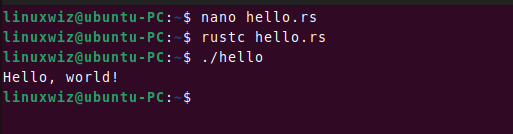
Create a new file hello.rs using the nano command.
$ nano hello.rs
Then paste the following content and save it.
fn main() {
println!("Hello, world!");
}
Finally, you can compile and run the program with these commands.
$ rustc hello.rs
$ ./hello
Output:
Method 2: Install Rust using rustup
rustup is the most recommended way to install and manage Rust installation. It also allows you to switch between and manage different versions of Rust.
In this section, we will install Rust using the rustup installer.
Update and refresh your system repositories.
$ sudo apt update
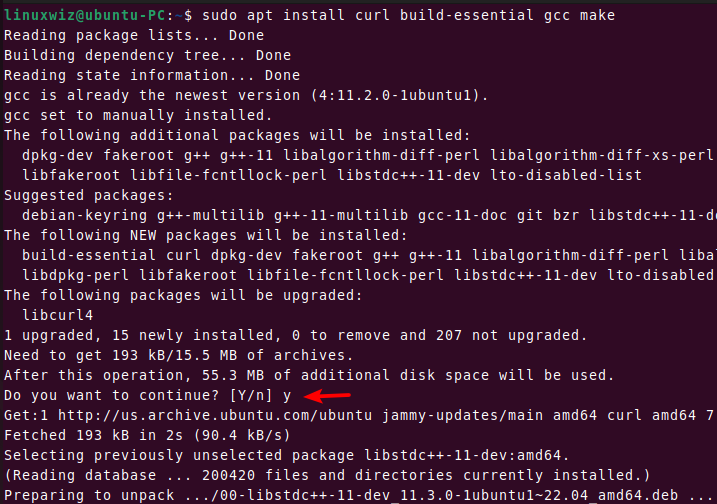
Next, install the required dependencies with the help of this command.
$ sudo apt install curl build-essential gcc make
Type y and press Enter to proceed with the installation.
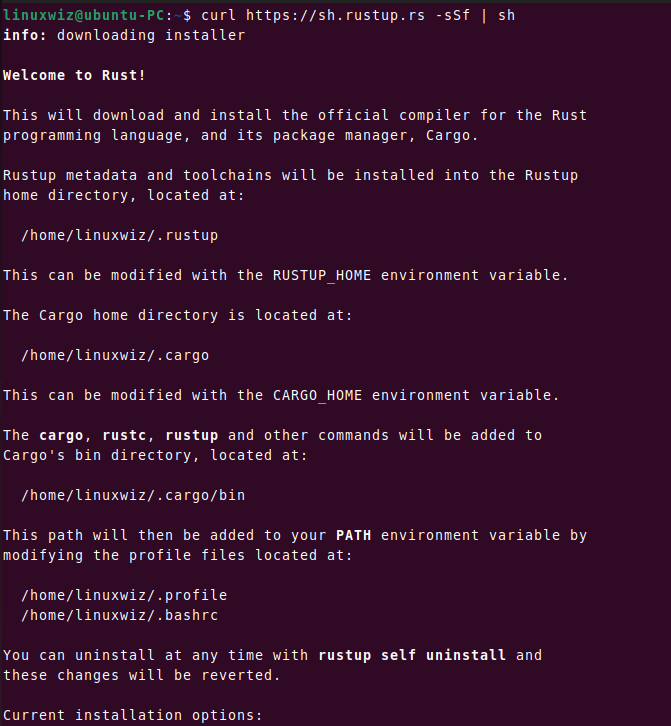
Once you finish installing the dependencies, execute this command to download the rustup shell script with curl. The sh command runs the script and starts the rustup installer.
$ curl https://sh.rustup.rs -sSf | sh
You should see a similar output below with the message “Welcome to Rust!”. The script will download and install the official compiler for the Rust language and its package manager, Cargo.
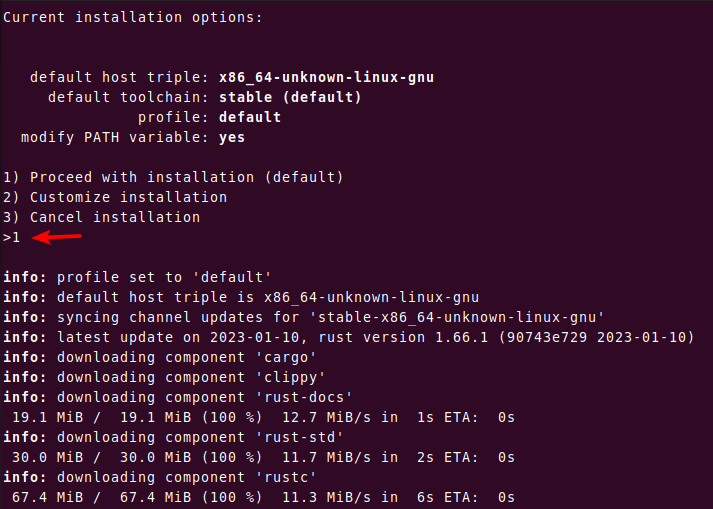
You will be asked to choose the installation options for Rust. Press 1 and hit Enter to proceed with the default installation. You can customize the installation by selecting option 2 if you are familiar with rustup.
After the installation completes, it will display the following output.
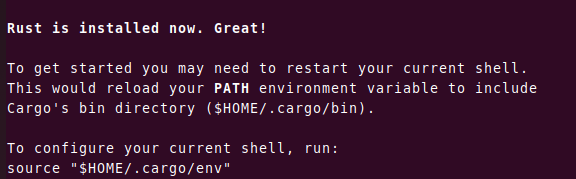
Now, you will need to configure the current shell with this command.
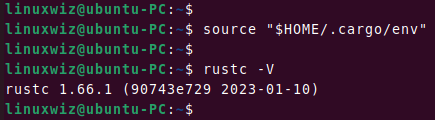
$ source "$HOME/.cargo/env"
To verify that Rust has been installed correctly, run the below command.
$ rustc -V
Create and Manage Rust project with Cargo
Cargo is the package manager tool for Rust. It is used to manage dependencies, compile, and build Rust projects.
You can create a new project hello_project using the following command.
$ cargo new hello_project
It creates a new directory and project called hello_project. Navigate to the hello_project directory and list the files.
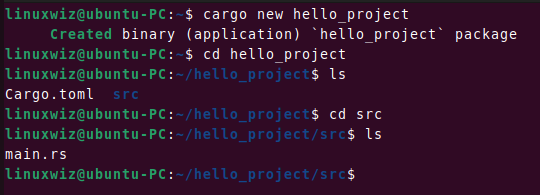
As you can see, Cargo has created a file Cargo.toml and a directory src that contains a file main.rs. Now open main.rs file in your text editor of choice.
$ nano main.rs
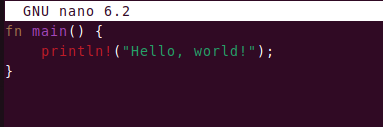
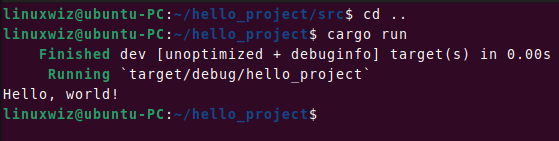
Cargo has already generated a “Hello World” program. You can add your code to this file. Close the editor and navigate back to the hello_project directory. Then run the below command to compile and run the code.
$ cargo run
Additional useful commands
Updating Rust
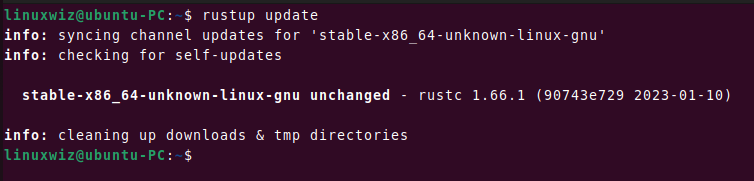
rustup includes a built-in update command, which makes it easy to stay up-to-date with the latest version of Rust.
Execute this command in your terminal to update Rust.
$ rustup update
Uninstall Rust
When you no longer require Rust, you may want to remove it from the system. To do so, use this command:
$ rustup self uninstall
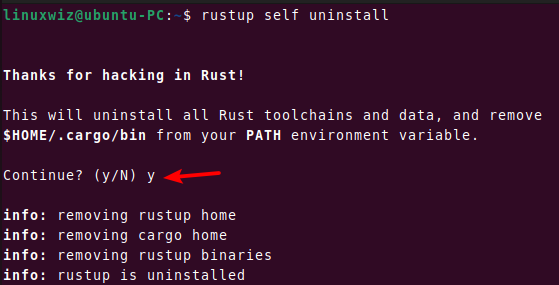
Rust is successfully uninstalled from the system.
Conclusion
That’s it! Now you know how to install Rust programming language on Ubuntu 22.04. Using cargo, you can start creating and building Rust projects with ease.
We hope you find this tutorial helpful. If you have any confusion, please let us know in the comment section.