
Introduction
Hadoop is an open-source software framework that is used for distributed storage and processing of extremely large datasets ranging in size from gigabytes to petabytes of data. Hadoop can be set up over a cluster of computers to analyze huge datasets in parallel.
The four main modules in the Hadoop framework are:
- Hadoop Common: A set of common libraries used by the other Hadoop modules.
- Hadoop Distributed File System (HDFS): A distributed file system that works as the storage unit across all machines.
- Yet Another Resource Negotiator (YARN): A resource management unit which manages and monitors cluster nodes and resource usage. It handles the scheduling of resource requests in a distributed environment
- MapReduce: A processing model to process large sets of data in parallel.
This tutorial will teach you how to install and set up Hadoop on the Ubuntu system.
Prerequisites
- A non-root user with Sudo privileges on an Ubuntu machine
Step 1: Java Installation
Since Hadoop is a Java-based programming framework, it requires a compatible Java Runtime Environment (JRE) and Java Development Kit (JDK). Before getting started, you have to update the packages on the system using the following command.
sudo apt update
Then you can proceed to install the default Java Development Kit.
sudo apt install default-jdk
Once the installation is complete, check the Java version.
java -version
Output:

Step 2: Setting Up a Non-Root User for Hadoop
It is recommended to have a distinct non-root user for the Hadoop environment. It helps to improve security and arrange clusters more efficiently.
For running Hadoop services smoothly, the user should be able to create a passwordless SSH connection with the localhost. For SSH connection, you will need to install OpenSSH on your Ubuntu first.
Install OpenSSH on Ubuntu
Run the following command to install both the OpenSSH server and client application.
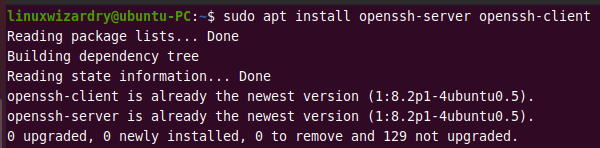
sudo apt install openssh-server openssh-client
Output:
As you can see, we already have the newest version of the OpenSSH client and server on our machine.
Create a Hadoop user
You can add a new user by using the adduser command in Linux.
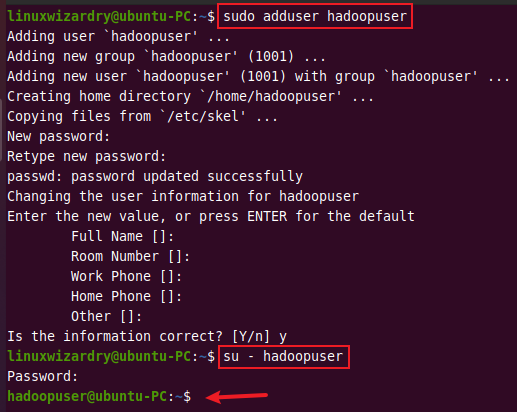
sudo adduser hadoopuser
We have used the username hadoopuser. You can choose any username you want. Once the user is created, switch to that user using the command below.
su - hadoopuser
Output:
Now, let’s enable the user to establish a passwordless SSH connection with the localhost.
Enabling Passwordless SSH for a Hadoop User
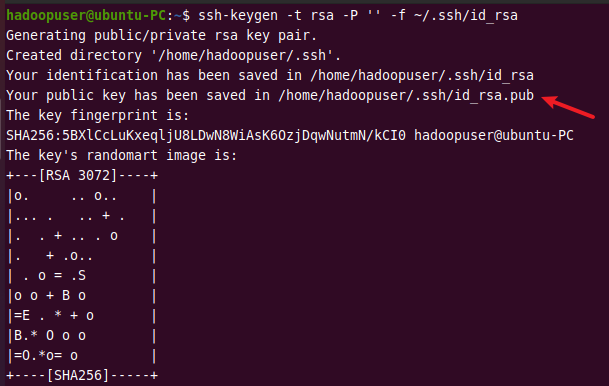
The following command generates an SSH key pair in the specified location /.ssh/id_rsa.
ssh-keygen -t rsa -P '' -f ~/.ssh/id_rsa
Output:
Use the following command to save the public key as authorized_key in the list of authorized keys.
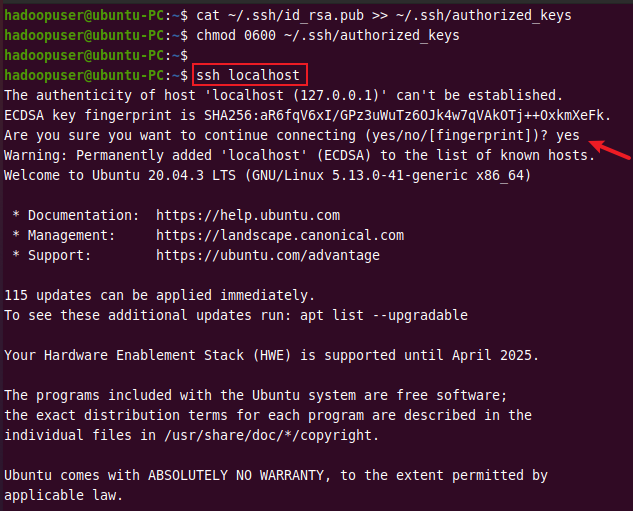
cat ~/.ssh/id_rsa.pub >> ~/.ssh/authorized_keys
Normally, the user will be required to enter a password every time to create an SSH connection. You can avoid this requirement by setting the following permission for a user with the chmod command.
chmod 0600 ~/.ssh/authorized_keys
Now, verify the SSH setup by connecting to the localhost using the command below.
ssh localhost
Output:
Step 3: Download and Install Hadoop
The next step is to download Hadoop from the official Apache Hadoop website. You have to select the version of Hadoop you want to download.
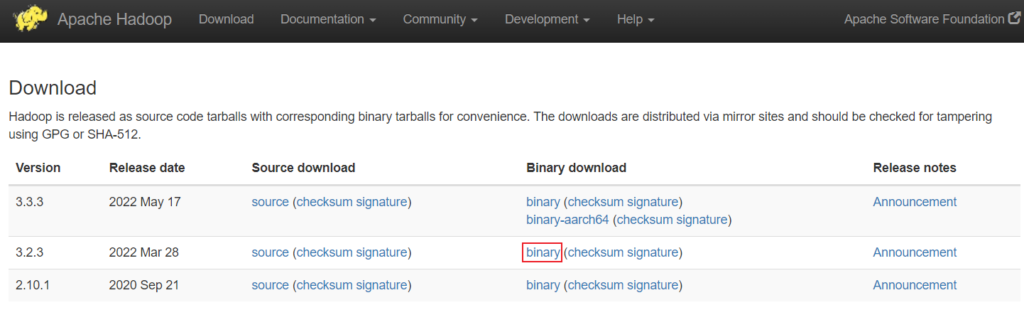 We have selected a binary download of
 Hadoop version 3.2.3. After selecting an option, you will be provided with a mirror link to download the Hadoop tar file.
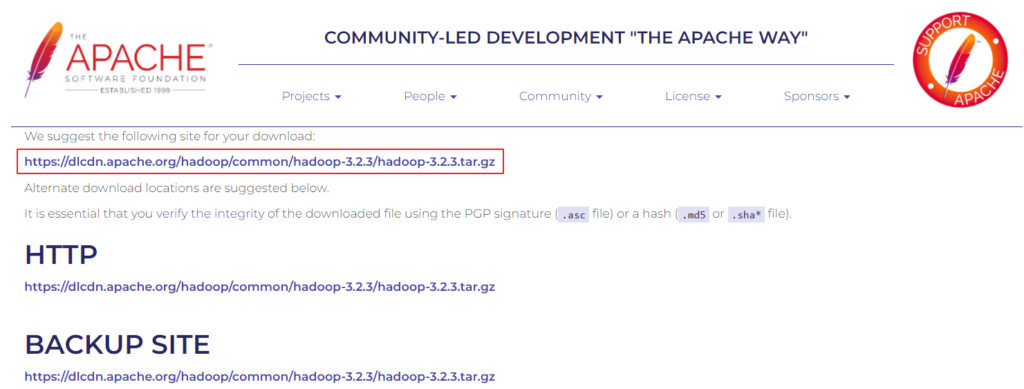 Use the given link with the
 wget command to download the Hadoop tar package.
wget https://dlcdn.apache.org/hadoop/common/hadoop-3.2.3/hadoop-3.2.3.tar.gz
Output: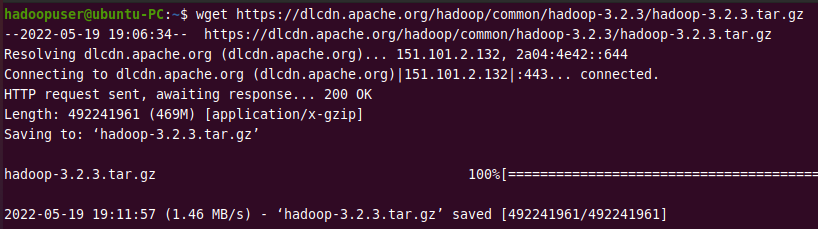
After downloading the file, extract the archive file to proceed with the installation.
tar xzf hadoop-3.2.3.tar.gz
Output:

All the contents inside the package are now extracted into a directory hadoop-3.2.3.
Step 4: Configure Hadoop Environment Variables
To configure the Hadoop environment, the following configuration files have to be modified.
- ~/.bashrc
- hadoop-env.sh
- core-site.xml
- hdfs-site.xml
- mapred-site-xml
- yarn-site.xml
hadoopuser will require the root privileges to edit the configuration file. First, let’s add hadoopuser to the sudoers group for providing sudo privileges.
Add User to the Sudoers Group
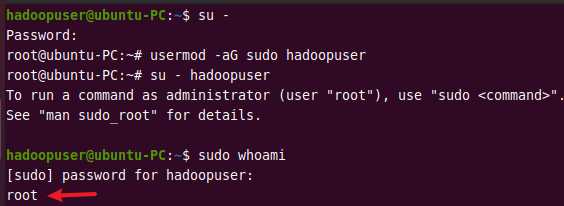
Switch to the root user using the command below.
su -
Then run the following command to add hadoopuser to the sudo group.
usermod -aG sudo hadoopuser
Switch back to hadoopuser using su - hadoopuser and run the following command to verify if it is in the sudoers list. It should return root.
sudo whoami
Output:
Edit bashrc
You can edit the .bashrc shell configuration file using any text editor. The steps in this tutorial use the nano editor for editing configuration files.
sudo nano .bashrc
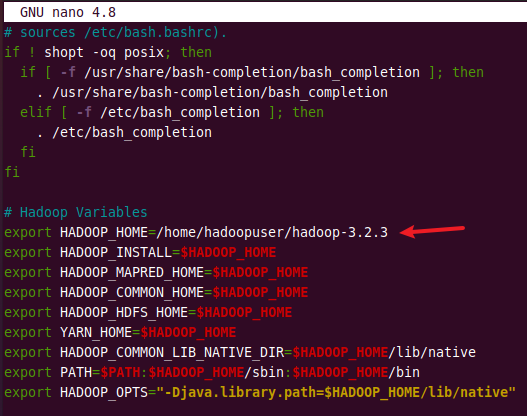
Append the following content to the end of a .bashrc file and modify the HADOOP_HOME path according to your path.
# Hadoop Variables
export HADOOP_HOME=/home/hadoopuser/hadoop-3.2.3
export HADOOP_INSTALL=$HADOOP_HOME
export HADOOP_MAPRED_HOME=$HADOOP_HOME
export HADOOP_COMMON_HOME=$HADOOP_HOME
export HADOOP_HDFS_HOME=$HADOOP_HOME
export YARN_HOME=$HADOOP_HOME
export HADOOP_COMMON_LIB_NATIVE_DIR=$HADOOP_HOME/lib/native
export PATH=$PATH:$HADOOP_HOME/sbin:$HADOOP_HOME/bin
export HADOOP_OPTS"-Djava.library.path=$HADOOP_HOME/lib/native"
After adding all variables, save and exit .bashrc file. Then execute the following command to activate the environment variables in the currently running environment.
source ~/.bashrc
Edit hadoop-env.sh
First, you need to know the path of the file where Java is installed. You can use the which command to get the location of Java.
which javac
Output:
/usr/bin/javac
You can use the above path to find the OpenJDK directory. It will be later used to assign to the $JAVA_HOME variable.
readlink -f /usr/bin/javac
Output:
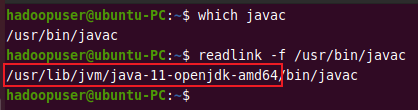
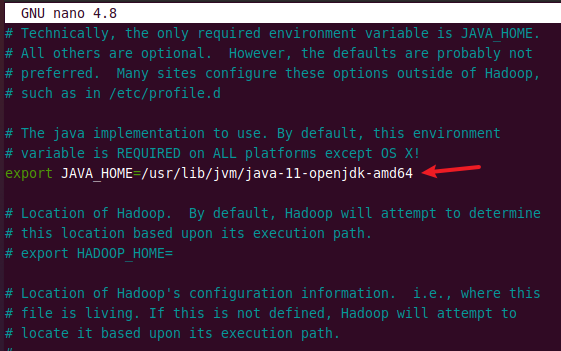
Copy the above path up to amd64 and open hadoop-env.sh file using the text editor.
sudo nano $HADOOP_HOME/etc/hadoop/hadoop-env.sh
Search for JAVA_HOME and uncomment it by deleting the # symbol. Then paste the above copied path as shown in the image below.
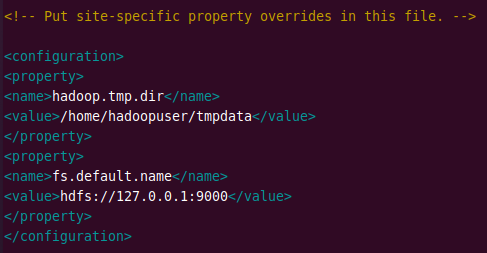
Edit core-site.xml
The core-site.xml includes configuration properties for Hadoop. It can override the default values that Hadoop uses when starting up.
sudo nano $HADOOP_HOME/etc/hadoop/core-site.xml
Add the following lines to the file.
<configuration>
<property>
<name>hadoop.tmp.dir</name>
<value>/home/hdoop/tmpdata</value>
</property>
<property>
<name>fs.default.name</name>
<value>hdfs://127.0.0.1:9000</value>
</property>
</configuration>
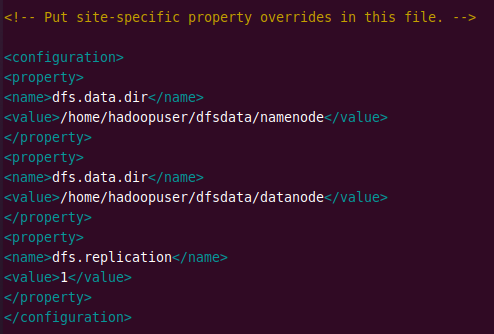
Edit hdfs-site.xml
The hdfs-site.xml file specifies the namenode and the datanode directories.
sudo nano $HADOOP_HOME/etc/hadoop/hdfs-site.xml
Add the following configuration and change the NameNode and DataNode directories according to your locations.
<configuration>
<property>
<name>dfs.data.dir</name>
<value>/home/hadoopuser/dfsdata/namenode</value>
</property>
<property>
<name>dfs.data.dir</name>
<value>/home/hadoopuser/dfsdata/datanode</value>
</property>
<property>
<name>dfs.replication</name>
<value>1</value>
</property>
</configuration>
Edit mapred-site.xml
The mapred-site.xml file specifies the MapReduce framework to be used.
sudo nano $HADOOP_HOME/etc/hadoop/mapred-site.xml
Enter the following configuration in the mapred-site.xml file and save it. It will set the MapReduce framework value to yarn.
<configuration>
<property>
<name>mapreduce.framework.name</name>
<value>yarn</value>
</property>
</configuration>

Edit yarn-site.xml
The yarn-site.xml file contains configurations for the Node Manager, Resource Manager, Containers, and Application Master.
sudo nano $HADOOP_HOME/etc/hadoop/yarn-site.xml
Add the following content to the file.
<configuration>
<property>
<name>yarn.nodemanager.aux-services</name>
<value>mapreduce_shuffle</value>
</property>
<property>
<name>yarn.nodemanager.aux-services.mapreduce.shuffle.class</name>
<value>org.apache.hadoop.mapred.ShuffleHandler</value>
</property>
<property>
<name>yarn.resourcemanager.hostname</name>
<value>127.0.0.1</value>
</property>
<property>
<name>yarn.acl.enable</name>
<value>0</value>
</property>
<property>
<name>yarn.nodemanager.env-whitelist</name>
<value>JAVA_HOME,HADOOP_COMMON_HOME,HADOOP_HDFS_HOME,HADOOP_CONF_DIR,CLASSPATH_PERPEND_DISTCACHE,HADOOP_YARN HOME,HADOOP_MAPRED_HOME</value>
</property>
</configuration>

Step 5: Start Hadoop Cluster
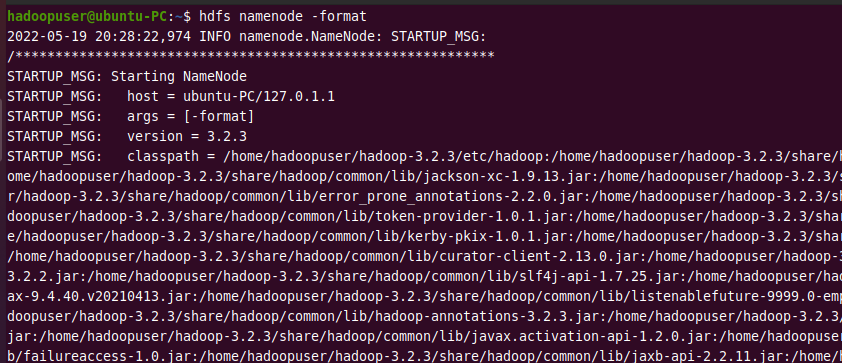
The Hadoop filesystem needs to be formatted before starting the Hadoop services for the first time.
hdfs namenode -format
NOTE: It should only be done when starting the Hadoop services for the first time. If you run this command after using Hadoop, it will format all data on the Hadoop file system.
Output:
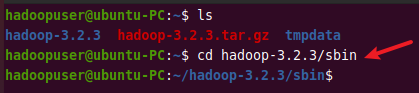
Now, you have to go to the sbin folder located in your Hadoop directory.
cd hadoop-3.2.3/sbin
Next, run the following command to start the Hadoop NameNode and DataNode.
./start-dfs.sh
Output:

Then start the YARN resource manager and node managers.
./start-yarn.sh
Output:

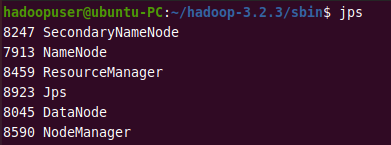
You can verify if Hadoop is up and running by using the following command.
jps
If all the HDFS and YARN daemons shown below are running, it means you have successfully configured Hadoop on your system.
Step 6: Verify Hadoop Cluster
As we have Hadoop services running successfully, let’s test the Hadoop cluster by creating some directories in the Hadoop filesystem.
The following command creates a directory /test in the Hadoop file system.
hdfs dfs -mkdir /test
Run the list directory command to view the above directory.
hdfs dfs -ls /
Output:

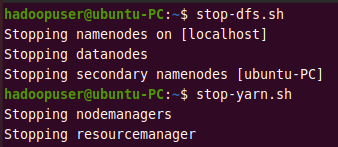
Step 7: Stop Hadoop Cluster
You can stop Hadoop NameNode and DataNode and YARN resource manager and node managers at any time by using the following commands as a Hadoop user.
To stop namenodes and datanodes:
stop-dfs.sh
To stop resourcemanagers and nodemanagers :
stop-yarn.sh
Output:
Conclusion
In this tutorial, you have learned how to install and configure Hadoop on the ubuntu system. We also showed how you can verify whether Hadoop is installed successfully by running some commands. If you have any confusion, let us know in the comment section below.