
Introduction
PostgreSQL is a free and open-source relational database management system that allows both SQL and JSON querying. With over 30 years of active development, it has gained a solid reputation for its reliability, data integrity, extensibility, ACID compliance, and robust features.
It allows you to create your own data types, define custom functions, and write different programming language codes without recompiling your database. It is compatible with all major operating systems including Windows, Linux/UNIX, Mac OS, IRIX, Solaris, etc.
This tutorial will teach you how to install and set up PostgreSQL on the Ubuntu system.
Prerequisites
For this tutorial, you will need a Ubuntu system having a non-root user with sudo privileges. The following step-by-step guide uses Ubuntu 20.04 system to demonstrate the installation and configuration of PostgreSQL on Ubuntu.
Step 1: Install PostgreSQL on Ubuntu
Before getting started, update your package information using the below command. It helps to get information about updated packages and their dependencies.
sudo apt update
Next, run this command to install the latest version of PostgreSQL along with a contrib package that provides additional tools and functionalities for PostgreSQL.
sudo apt install postgresql postgresql-contrib
Step 2: Check the PostgreSQL service
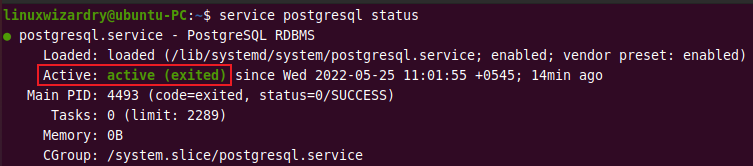
After completing the installation, the PostgreSQL service should be active by default. You can verify it using the following command.
service postgresql status
The output will be similar as shown in the image below.
Step 3: Connect to PostgreSQL Database
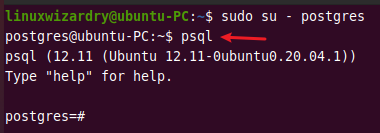
By default, PostgreSQL creates a user account postgres during the installation process. You have to log on to that account to connect and access the working shell of the PostgreSQL server.
sudo su - postgres
Then enter the following command to open the interactive Postgres shell.
psql
You can also open the Postgres shell without switching accounts. For example, this single command will launch an interactive Postgres shell as a postgres user.
sudo -u postgres psql
Similarly, PostgreSQL also creates a default database postgres during installation. The postgres user automatically connects to the database postgres when you run the psql command.
At the prompt, type the \conninfo command to check the details of the connection.
\conninfo

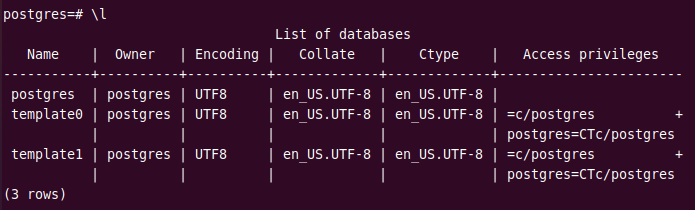
You can view a list of all databases by using the \l command.
\l
To exit the interactive interface, run the \q command.
\q
Step 4: Create a New Role
You can view a list of roles in PostgreSQL using the \du command.
\du

As you can see, there is only one role “postgres” which is the default role created during the installation process. It has superuser permissions and can create new roles and databases on the server.
The postgres user does not have any password, you have to set it yourself. For this, you have to run the below command at the prompt.
ALTER USER postgres WITH PASSWORD 'admin123';
It will set the password “admin123” for the postgres user.

Multiple roles will provide you the flexibility of managing databases as different users.
You can create a new role using the createuser command. The --interactive flag will prompt you to enter the new role’s name and ask if it should have superuser privileges.
createuser --interactive

After entering the value, launch the interactive shell and run \du command to verify the new role.
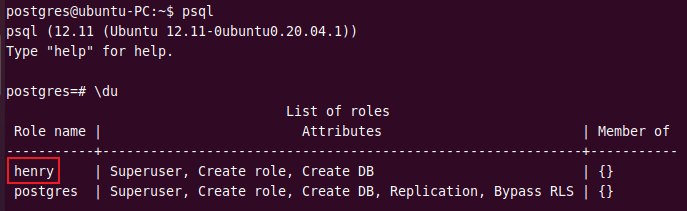
As you can see, the role henry is created and has superuser attributes.
Step 5: Create a New Database
You have successfully created a new role “henry” on the server. Now, let’s create a new database for the user “henry”.
By default, the role used to log in has a database with the same name that it can access in PostgreSQL. So, if you created a new database henry, the role henry will connect to it by default.
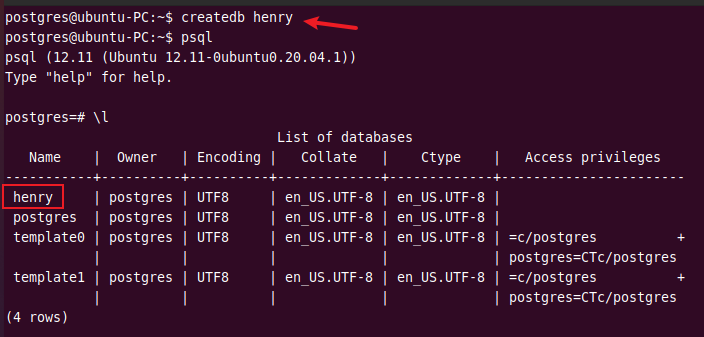
You can create a new database using the createdb command. This command creates a new database “henry”.
createdb henry
Run the \l command to check if the new database is created.
\l
Step 6: Open Postgres Shell with the New Role
A system account with the same username as the role is able to log in to that role. So, if you do not have a matching user with the same name, you have to create one first.
sudo adduser henry
After creating the user, switch to the user henry using the following command.
sudo su - henry
Run the psql command to open Postgres shell as user “henry”.
psql
Then type this command to check connection details.
\conninfo

As you can see, it shows that you are now connected to the database henry as user henry this time.
Step 7: Create Tables in the Database
A relational database can contain multiple related tables. A table has rows and columns. It is useful for storing structured data such as customers, products, employees, etc.
You can use \d command to view tables in a database.
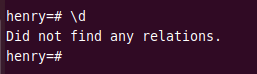
Currently, there are no tables in the database “henry”.
The CREATE TABLE statement creates a new table in the current database. The owner of the table will be the user executing the command.
The basic syntax of CREATE TABLE for creating tables is:
CREATE TABLE table_name (
column_name1 datatype (length) column_contraint,
column_name2 datatype (length) column_contraint,
column_name3 datatype (length) column_contraint,
);
It will define a new table, column names and types, max length, and column constraints.
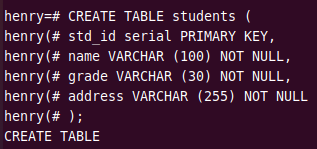
The following example creates a new table student having columns: std_id, name, grade, and address.
CREATE TABLE students (
std_id serial PRIMARY KEY,
name VARCHAR (100) NOT NULL,
grade VARCHAR (30) NOT NULL,
address VARCHAR (255) NOT NULL
);
The first column in the table uses serial data type for storing student ID numbers. It stores data in a sequential integer. The column constraint is PRIMARY KEY which means it is a unique value and not null. A table can have only one primary key.
The other three columns name, grade, and address also cannot have null values. For these columns, the maximum field length is also defined.
Run the \d or \dt command to display tables in a database.
\dt

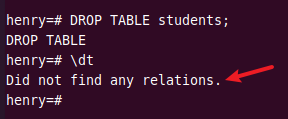
To remove tables from the database, you can use the DROP TABLE statement.
DROP TABLE students;
Conclusion
You have now successfully installed and configured PostgreSQL on your Ubuntu system. You have also learned to create a new role and connect it to the PostgreSQL database. We also showed you how to create and delete tables in the database. If you have any questions, please let us know in the comment section below.